Monday, March 20, 2023

Epoxy Skull and Walnut Wood Brain


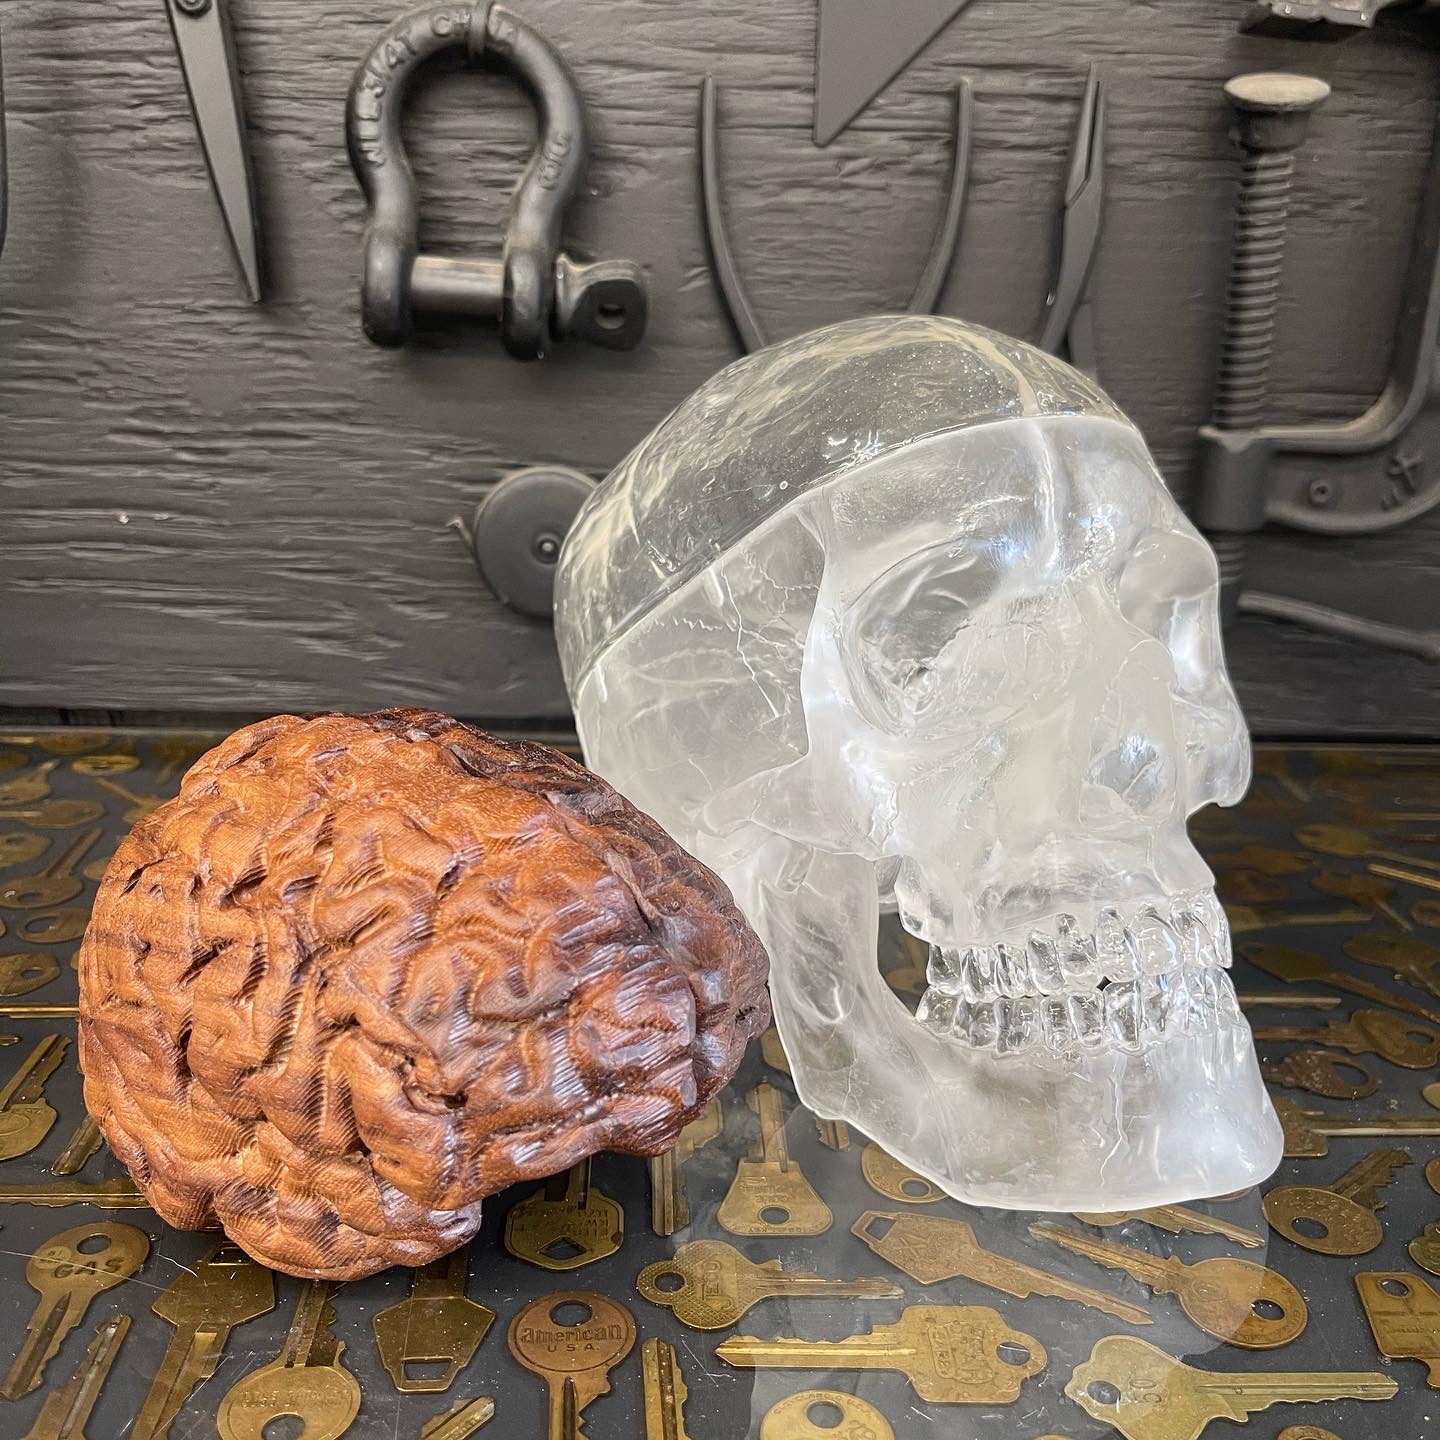
Today I’m showing you how I made a life size epoxy skull with a life size walnut wood brain to fit inside. I started by making mini skulls first and figure out what worked and what didn’t. I started by figuring out how to make silicone molds for casting. This took me awhile to figure out which products and methods worked best.


I found that using a pressure pot set at 35-40 PSI when making the silicone molds gets all the tiny bubbles out for a perfect casting. I also used the pressure pot when I poured the epoxy and left it in the pressure pot for 24 hours before de-molding. I used Total Boat thickset for the epoxy, which worked great. I used BBDINO platinum silicone 1:1 mold making for making my silicone molds. Once I figured out the epoxy skulls I moved onto making wood brains to fit inside on my OneFinity CNC.

I then used a Dremel to carve out the underside of the brain so that they fit in the epoxy skulls just right. I finished the wood brains with Total Boats Wood honey, which really brought out the colors of the wood brain. It took a lot of trial and errors to get the final results but over all I’m very happy with how they turned out. I’ll have a limited run of the epoxy skulls and wood brains for sale on my website. I hope you enjoyed this video and found some useful information. Thanks for checking out the how the project turned out over all. I'd love to hear your thoughts on this video and I'd love to see what you make, and be sure to tag me when you do @Wood_Brain on Instagram. Link to website: https://wood-brain-by-lindsay-zuelich... Materials used: Total Boat Thickset epoxy Total Boat Wood Honey Total Boat special brush cleaner BBDINO platinum silicone Walnut wood OneFinity CNC
📱 Follow Me for More DIY Inspiration: Instagram & TikTok: @Wood_Brain Patreon:   / wood_brain  


Saturday, March 18, 2023

How To Build An ARCH Backdrop


Today I’m sharing with you how I made a wooden arch backdrop for a friends wedding, using a jigsaw, miter saw, circular saw, and a scroll saw.


I started by making a circle jig for my Dewalt battery powered jigsaw. Then I cut a 1/2" thick 4'x8' sheet of plywood down to 3'-6"x 7' which made it more manageable to work with and move around with. I used the cut left over piece from the plywood to build a base for the backdrop.

I framed it out with 2x4's to give it more weight. I installed heavy duty L-brackets to the base and added two 2x4 pieces to the backdrop to give myself something to drill the L-backets into. Once everything was built I painted the backdrop with a white primer. while that dried I move on to cutting out the wood lettering for the backdrop. I used an over head projector to size the lettering and traced letters onto the wood I would then cutout on my scroll saw. I made each word to cut out more manageable by cutting them into smaller piece.

I drilled pilot holes in the letters where the centers need to be cut out and worked on those areas first by cutting them out on the scroll saw. Once all the letters were cut out I sanded them and painted them white with spray paint. Once everything was dry I painted the letters a pink color that the Bride to be requested. I also painted the backdrop arch a light beige color. I then used the over head projector once more to line up the lettering on the backdrop and I used 3M double sided mounting tape to attach the letters. I know I could have cut the letters out on my CNC, but I wanted to make this a simple and easy project. Hope you enjoyed it and found some use from it. Let me know your thoughts in the comments. Be sure to follow me on Instagram @Wood_Brain Business Inquires contact: LinzZuelich@yahoo.com Support me on Patreon: https://www.patreon.com/Wood_Brain?fa...


Friday, February 17, 2023

Wood Brain Documentary


Check out this youtube documentary that Justin Call Me Mabie made of me.

Lindsay Zuelich, otherwise known as Wood Brain, is a maker from Torrance, California who makes MAGIC with her hands. Lindsay quickly recognized that woodworking was a growing interest of hers after originally aiming her career towards that of an interior designer. However, the passion for making with her hands led her in other directions. Wood Brain is now a successful YouTube channel and Instagram account where Lindsay catalogs her crazy builds while showing audiences how they're done along the way. Her projects and content are vast and offer something for everyone. Lately, she has become more experimental as a maker and has dedicatedly spent significant time developing new skills and new products, especially geared towards epoxy resin. Becoming a full-time woodworker, maker, and content creator didn't come easy but it is definitely paying off in the Wood Brain universe. Enjoy meeting Lindsay in this installment of the Call Me Mabie documentary series! Video by Justin Mabie Instagram: https://www.instagram.com/_callmemabie_/ Website: http://callmemabie.com/ Shirts: https://www.callmemabie.com/shop/ @wood_brain Instagram: https://www.instagram.com/wood_brain/ Website: https://wood-brain-by-lindsay-zuelich...


Saturday, January 7, 2023

Ultimate Garage Makeover With Xyla Foxlin


In today’s video I’m sharing with you how I helped transformed my friend @xylafoxlin newly rented garage into a bright and functional workshop. Because Xyla is renting but has a one year lease, we wanted to try and do as many renter friendly things as possible, and we ran all the other ideas by her landlord in advance for approval.

We started by giving the garage a really good cleaning then painted the rafters of the garage with white paint. We opted to not insulate the walls … I KNOW!… I’m sure I’ll hear about it in the comments. But we didn’t insulate. After we put the walls up (without the insulation) we painted the walls white and hung wallcontrol on the areas that we wanted to hang tools.

Once the walls were addressed we tackled the floors. The rear section of the shop has some weird floor damage to the concrete that the landlord didn’t want to fix at this time. So we opted to put down a product by Armorall that’s similar to carpet but made for garages. The front section of the garage we used Rustouleum Epoxy shield with extra paint chips and sealed it with the clear epoxy coating. When Xyla moved in there was an old wooden work bench that needed a lot of love and that we did, we gave it a little bit of a face lift and upgraded wheels along with new hardware. We spent a day going through her other sheds on her property to clean up and organize her materials and tools.

Once we gathered everything she wanted to use and keep, we started to place them though out the workshop. Xyla treated herself and got a cabinet grade table saw by Saw stop and a Laguna band saw, and they both look great in the shop. We added lights from Ensenior lights sold on Amazon and we spread them evenly through the shop. They’re plug and play making it easy for her to take them with her later if need. We hung some of her memorabilia and awards around the shop for décor. The over all outcome makes me so happy I love how her shop turned out and how she still has room to grow into it by it not being completely filled to the max.

I’d love to hear your thoughts on this video in the comments. Unless it’s about the insulation... Just kidding I love hearing how we should have added it. Be sure to follow me on Instagram @Wood_Brain Business Inquires contact: LinzZuelich@yahoo.com Support me on Patreon: https://www.patreon.com/Wood_Brain?fa...